Thursday, April 25, 2013

How to Expand Nexus 7's Memory

Nexus 7, the affordable tablet with its delightful performance just runs out of memory while you need more storage! This is why, I think, expanding the nexus 7's memory can unleash the device's optimum functionality. With only 8 GB, 16 GB and 32 GB available memory users of Nexus 7 surely can't get enough of the device; thus, this post will help you to know: How to Expand Nexus 7's memory.

First of all, to expand the memory of your Nexus 7 device you will need three instruments.
1. An OTG cable
2. An android app that can connect the device with another flash memory device [such as pen drive, portable HDD]  via USB.
3. An USB flash memory.


For rooted nexus devices the StickMount app on google play; and for the devices that are not rooted or with the stock Jelly Bean OS, the Nexus Media importer app will flawlessly provide the facility to expand nexus 7's memory as far as you want! Well, Stickmount is free, while Nexus media importer is a paid app on google play [it costs $3.99]. As we like to keep our android up-to-date and to do that sticking with the stock firmware is best policy, thus we eventually necessitate the paid app instead of the free one!

So, to download Nexus media importer for your nexus 7 device, click on the link below and download it from mobilism.com.

http://forum.mobilism.org/viewtopic.php?t=464303

After you have installed either StickMount or Nexus media importer you may now proceed to expand the memory of Nexus 7. First, attach the USB flash memory device to the OTG cable and then connect it with your nexus 7 device. The application will automatically launch itself as it recognizes the flash memory.

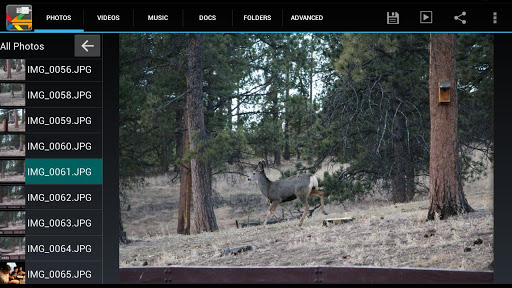
The best feature this Media importer app delivers--is that it enables you to play any media directly from the flash memory, so that you don't need to copy it in your device.

If you face any problem in Expanding Nexus 7's memory, feel free to comment.


Read more »

Tuesday, February 7, 2012

Earn Easy Money By Clicking From Bangladesh or Anywhere [No Investment]

Earning money isn't always such easy as clicking and visiting websites are. But even if you don't earn a penny, you do visit websites just for time pass sometimes. I believe doing something with a purpose is rather boring than doing something for fun or to pass our leisure time. Especially for money, doing something is really boring, but we find it very hard to deny the money though! Thus, I have a very easiest way to earn money over the Internet by  just clicking. 

Firstly, the question arises in your mind is, how much they pay for each click?

The answer is they will pay you $0.01 (1 cent) for one click. Everyday, you will get 100 links per day to click and clearly you have to wait 30 seconds [the seconds' counting begins right when you click and not after the website loads].

So as it stands, your monthly income is: $30! Its not a pretty high figure - isn't it?

  • How much you would have to invest to get the opportunity to earn?
Basically, not even a penny! Technically, you would have to invest $50 for a premium account that would actually earn you the money, but again, you don't have to pay $50 from your pocket. You can spend 50 days by clicking and then when you have $50 in your account balance, you can upgrade the free account to a premium account with that money. So you see? No Investment at all! 

  • How many accounts you can have?
The answer is simple. You can have unlimited accounts! 

  • What about Referral Earning?
This is the most interesting part. If you are a good referrer of anything then you have a bright future. Every penny that one earns, the referrer of that person will earn 10% of it! So if you can refer 100 person then you will earn everyday through their clicks and not making one click by yourself! Another interesting thing is: One cannot just sign-up without any referrer!

  • Ready to start?
If you are ready to start earning money from home by only clicking, then Click Here
For further more to know about, visit the website CLICKONLINEEARN.COM

Referrer:    stofu

Read more »

Saturday, January 28, 2012

Another Cool Email Subscription Box For Blogger

A few days back I have shown you how to add a social and email subscription widget below blogger posts, and now I have another cool email subscription box for your blog. This email subscription box or widget comes along with RSS Feed subscription too so, that it may cope with different viewer's choice. You can see the demonstration of the email subscription widget below in the image.


So if you liked the subscription box, lets show this email subscription box below your every posts in blogger.

Step One: Login to your blogger account and go to Design >> Edit HTML. [In new blogger interface: go to Template >> Edit HTML]

Step Two: Click on Expand widget templates, and then look for the code <data:post.body/>.

Step Three: Paste the following code below <data:post.body/> and click on Save Template.

<b:if cond='data:blog.pageType == &quot;item&quot;'>
<div id='subscribe-bottom'>
<span style='margin-right:10px;'><a href='http://feeds.feedburner.com/YOUR FEED NAME'>
<img border='0' src='https://blogger.googleusercontent.com/img/b/R29vZ2xl/AVvXsEg3u2TgqxCzcMJmtwhJ_QK3QKJgISjeR5bdYTF8a1YgQeqaiApXxJbQ5Cobv2SN62h2YTKLgXT6jpzmM3qq4iUdDp5cYaAe5cAR1jafxAYccmWT-9yXn-xdaZUjzynrCP17Vsi3wY0UQws/s1600/subscribe_rss_official.png'/></a>
</span>
<span>
<a href='http://feedburner.google.com/fb/a/mailverify?uri=YOUR FEED NAME&loc=en_US'><img src='https://blogger.googleusercontent.com/img/b/R29vZ2xl/AVvXsEgYJ8WwM6ER1weVdMl3IXI7h3QmoHQS9hv4QU72-hafSZerYaeiHTdCcjcEzgvHBsQ9xRzqBRzzpXJzS4-44S_T9ySiZ01YrCkcJeo0qlsIzNFStxQC9VkzeLsCwcFdv0wGkupBkCEYckg/s1600/subscribe_email_official.png'/>
</a></span>
</div>
</b:if>

Note: Do not forget to replace  "YOUR FEED NAME" text with your blog's feed name.


After you have saved the template, check out your posts to see that the widget is working properly. If it is not working properly the report here with a comment. Good luck with adding this subscription box to your blogger blog.

Read more »

Friday, January 27, 2012

How To Find a [Specific] Blogspot Blog

Since many people search for blogspt blogs but come undone only sometimes about finding their desired blogspot blog. I think a simple trick may ease their search for a blogspot blog. In most cases, people whenever searching a blogspot blog, just include the word "blogspot" alongside their keyword [e.g. daily life blogspot]. But not luckily it always brings up the blogspot blogs at the top. Because google do not give the same priority to the sub-domains as they prioritize top level domains, and also the blogspot blogs are not such improved from the SEO aspect as other blogs are [e.g. wordpress].


Well to find your desired blogspot blog you have to change the spider a little bit. And that is to include SITE:BLOGSPOT.COM after you search keyword. As an example, suppose you want to find a blogspot blog which is about "Daily Life", then you can write in google's search box like this one: DAILY LIFE SITE:BLOGSPOT.COM.


Well, this trick also applies to other sites like, if you want to search something within goal.com, just write your keyword and then alongside include site:goal.com.

To know more about google search tricks, just visit google's basic search help page.

Read more »

Monday, January 23, 2012

Show Related Posts Without Thumbnail Below Blogger Posts

Linkwithin widget to show related posts below every blogger posts is quite popular and useful. But however, there are not every posts that has at least one image in it. Thus, showing related posts with thumbnails may not be chosen by most blogger who in fact may choose to show related posts without thumbnails below blogger posts. If you are interested to show your visitors your blogs related posts without any thumbnail, then lets just do it.

Related Posts Without Thumbnail in Blogger


Step one: Go to Template >> Edit HTML. [In old blogger Go to Design >> Edit HTML] And then click on Expand Widget Template.

Step two: Find </head> and just above it paste the code below.

<style>
#related-postz { float: left; width: 100%; margin-top: 20px; margin-bottom: 20px; margin-left: 5px; line-height: 25px; font-weight: bold; font: 18px Arial,sans-serif; margin-bottom: 10px; }
#related-postz .widget { list-style-type : none; margin : 5px 0 5px 0; padding : 0; }
#related-postz .widget h2, #related-posts h2 {
font-size: 0.7em;
font-weight: bold;
color: black;
font-family: Georgia, &#8220;Times New Roman&#8221;, Times, serif;
margin-bottom: 0.75em;
margin-top: 0em;
padding-top: 0em; }

#related-postz a { text-decoration : none; }
#related-postz a:hover { text-decoration : underline; }
#related-postz ul { border : medium none; margin : 10px; padding : 0; }
#related-postz ul li {
display : block;
background : url(&quot;http://smallbusiness.chron.com/favicon.ico&quot;) no-repeat 0 0;
padding-left : 21px;
padding-bottom : 1px;
margin-bottom : 5px;
line-height : 2em;
border-bottom:1px dotted #cccccc;
font-size: 0.7em;
font-weight: bold;
color: black;
font-family: Georgia, &#8220;Times New Roman&#8221;, Times, serif;
margin-bottom: 0.75em;
} </style>
<script src='http://blogfilez.googlecode.com/files/related.js' type='text/javascript'/>

Step three: Now again, find <data:post.body/> and just below it, paste the following code.


<b:if cond='data:blog.pageType == &quot;item&quot;'>
<div id='related-postz'>
<font face='Verdana' size='4'><b>Related Posts:</b></font>
<b:loop values='data:post.labels' var='label'><b:if cond='data:blog.pageType == &quot;item&quot;'>
<script expr:src='&quot;/feeds/posts/default/-/&quot; + data:label.name + &quot;?alt=json-in-script&amp;callback=related_results_labels&amp;max-results=5&quot;' type='text/javascript'/></b:if></b:loop>
<script type='text/javascript'> removeRelatedDuplicates(); printRelatedLabels();
</script>
<div align='right' style='font-size:11px'><a href='http://s-tofus.blogspot.com/2012/01/show-related-posts-without-thumbnail.html'>Related Posts for blogger</a></div></div>
</b:if>

Step four: Now click on Save Template and Enjoy!

Are you happy with Linkwithin related post widget? However, you are welcome to modify this style to a new look. Also, I haven't figured out yet about how to show related posts' with little snippet as it can be shown in wordpress blogs. I will soon feature related posts with snippet in blogger. So Stay tuned and good luck!

Disclaimer: There are many different styles in different blogs' template. So having difficulties to fit this widget in your blog perfectly. But if you are facing any kind of problems, then please leave a comment below. 

Read more »

Monday, January 9, 2012

[How To] Add a Social and Email Subscription Box Below Every Post in Blogger

A subscription box doesn't really help you out to get the highest level of subscribers when it's on the sidebar. Hence, if you have a subscription box below your posts then it may help you to achieve targeted subscribers for your blog. And this tutorial will definitely lead you to add an email subscription box with social subscription support below your every blogger posts.

This is how the subscription box looks like:


How to add a social and email subscription box below every blogger posts?

Step One: Go to Design => Edit Template [In new blogger interface: go to Template => Edit HTML].

Step Two: Click on Expand widget Template  and find /* FOOTER */  .

Step Three: Just above /* FOOTER */  paste the following code. 

.stay-connected {
background: #ffffff;
margin: 10px 0 10px 0;
padding: 10px;
border: 1px solid #E6E6E6;
overflow: auto;
}
#stay-icons {
float: left;
margin: 0 5px 0 0;
padding: 2px;
}
/*end stay connected*/

Step Four: Then Find <data:post.body/> and the paste the following code just below <data:post.body/>.


<b:if cond='data:blog.pageType == &quot;item&quot;'>
<div class='stay-connected'><h2>Stay Connected With Free Updates</h2><table border='0'><tbody>
<tr><td>
<a href='YOUR FEEDBURNER URL' imageanchor='1' style='margin-left: 1em; margin-right: 1em;' target='_blank'><img border='0' src='http://cdn1.iconfinder.com/data/icons/functionsocial/Social_RSS.png'/></a></td><td>
<a href='http://twitter.com/USERNAME' imageanchor='1' style='margin-left: 1em; margin-right: 1em;' target='_blank'><img border='0' src='http://cdn1.iconfinder.com/data/icons/functionsocial/Social_Twitter.png'/></a></td><td>
<a href='FACEBOOK PAGE URL' imageanchor='1' style='margin-left: 1em; margin-right: 1em;' target='_blank'><img border='0' src='http://cdn1.iconfinder.com/data/icons/functionsocial/Social_Facebook.png'/></a></td><td>

<div class='spice-email' style='margin-left:20px;'>
Subscribe via Email
<form action='http://feedburner.google.com/fb/a/mailverify' id='feedform' method='post' onsubmit='window.open(&apos;FEEDBURNER FEED NAME&apos;, &apos;popupwindow&apos;, &apos;scrollbars=yes,width=520,height=520&apos;);return true' target='popupwindow'>
<input class='textarea' gtbfieldid='3' name='email' onblur='if(this.value==&apos;&apos;)this.value=this.defaultValue;' onfocus='if(this.value==this.defaultValue)this.value=&apos;&apos;;' type='text' value='Enter Your Email'/>
<input name='uri' type='hidden' value='FEEDBURNER FEED NAME'/><input name='loc' type='hidden' value='en_US'/>
<input class='spice-emailsubmit' type='submit' value='Submit'/>
</form>
</div></td></tr></tbody></table></div>
</b:if>
Note: You can also paste this code below <div class='post-footer-line post-footer-line-1'> at times to show it below other widget's. [Don't forget to change the RED texts with your blog's information] 

Step Five: Click on Save Template.

You're all done with adding an email subscription box below your blogger posts. If you face any kind of problems then leave a comment below.

Read more »

[How To] Add an Ad Space or Gadget Area Beside Blogger Header

You must have seen that many blogs has an ad space in/beside blogger header. Mostly, all of the blogs use a 468*60 ad space beside the blogger header. In this case, if you want to have an ad space in your blogger header then you have to split your blogger header into to parts [However, it's not going to harm your blog's SEO]. And by then you may wish to use this space as a gadget area if you don't really want to show adsense ads there.

After you've added an ad space you'll have a new gadget area like this one:


How to add an ad space beside blogger header?


  • Go to Design => Edit HTML [in new blogger interface go to Template => Edit HTML].
  • Then Find the following codes or similar codes. [Press Ctrl+F; then search for it]
#header {
margin: 5px;
border: 1px solid $bordercolor;
text-align: center;
color:$pagetitlecolor;
}

  • Now replace the above codes with the code below. 
#header {
          margin-top:-15px;
          width:370px;
          float:left;
          height: 90px;}
#top-ad {
         width: 470px;
         float: right;
         margin-top: 5px;
         padding: 0;
}

  • Again find the following code. 
<div id='header-wrapper'>
<b:section class='header' id="header' maxwidgets='1' showaddelement='no'>
<b:widget id='Header1' locked='true' title='NAME OF YOUR BLOG WILL BE HERE (Header)' type='Header'>
</b:widget>
</b:section></div>
 Note: You can only find the <div id='header-wrapper'>  code and the rest will be below that code. 

  • Finally replace it with the code below and click on Save Template. 
<div id='header-wrapper'>
<div id='header'>
<b:section class='header' id='blog-title' maxwidgets='1' showaddelement='no'>
<b:widget id='Header1' locked='true' title='NAME OF YOUR BLOG WILL BE HERE (Header)' type='Header'/>
</b:section>
</div>

<div id='top-ad'>
<b:section class='top-ad' id='top-ad' showaddelement='yes'>
<b:widget id='HTML3' locked='false' title='' type='HTML'/>
</b:section>
</div>
</div>

You're all done with adding a gadget area or an ad space in/or beside your blogger header. However, if you are stuck with something or having problems with implementing the process then please don't feel shy to comment.

Read more »

Thursday, October 13, 2011

How To Get High PR Do-Follow Link Juice?

As no-follow links don't pass any link juice (neither the Page-Rank nor the Anchor Text), thus the high PR do-follow backlinks are the wheel-power of Search engine optimization (SEO). Definitely, I have discussed about some link building mistakes, and also, there's another kind of link building trick that you do know but you care less! The Out-Bound links from a page really matters, and in fact, it has a mass effect on your blog pages' Page-Rank. As it is mentioned by Matt Cutts' that, the pages get crawled by google is roughly proportionate to your Page-Rank, hence, you must look at the link juice that the do-follow link will pass to your page and it's passed page-rank too. Finally, we must not get do-follow links from highly spammed pages or a page with above 200 out-bound links.

Read more »